Start with cold oysters and a clear workspace
Freshly shucked oysters can add a briny note to baked oysters, seafood rice or a warm filling for tostadas. Even when you plan to cook them, treat the shucking step as raw-seafood preparation. Buy oysters from a reputable seller and keep them refrigerated until you are ready to work. Discard oysters with broken shells or an unpleasant odor. An open shell that does not close when tapped is another reason to discard an oyster, though a closed shell alone cannot establish that it is safe.
Set a sturdy cutting board on a non-slip surface and place a bowl nearby for oyster meat and liquid. Have another container ready for discarded shells. Keep other ingredients, especially foods that will not be cooked, away from the shucking area. Wash your hands before starting, and clean and sanitize the board, tools and work surface after they have touched the oysters or their liquid.
Protect your hand and use the right tool
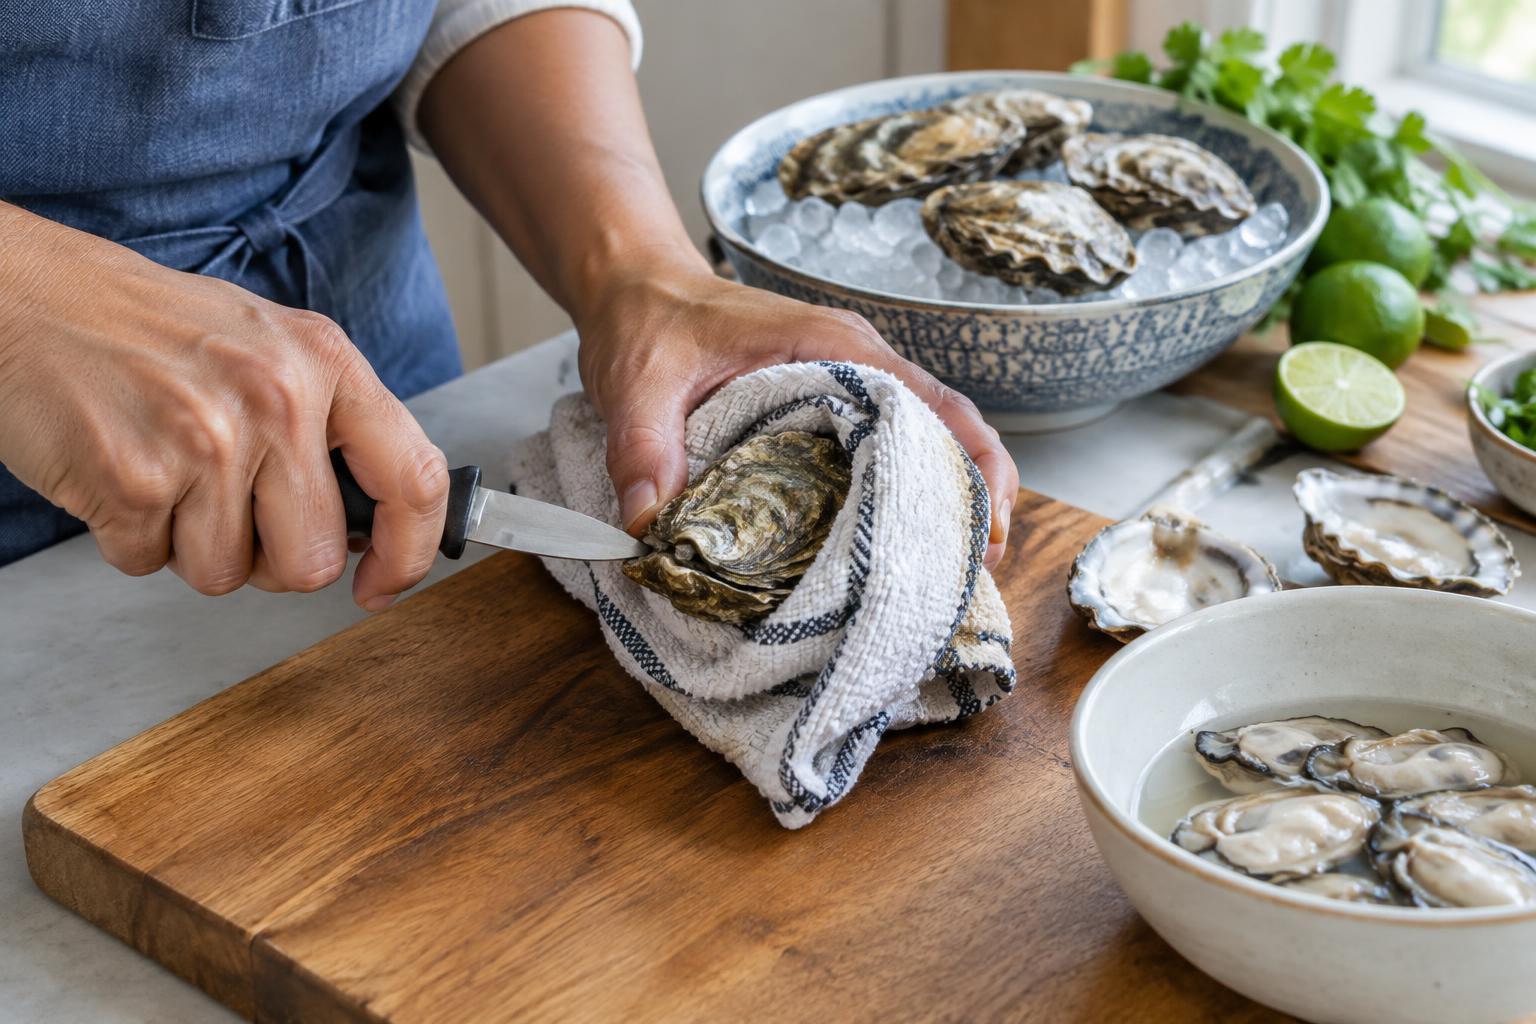
Use a short, sturdy oyster knife designed for prying shells apart—not a sharp kitchen knife, which can slip or break under pressure. Protect the hand holding the oyster with a cut-resistant glove suitable for food preparation. A thick, clean folded towel adds grip and puts another layer between your hand and the shell. A towel alone may not protect against a slipping blade, so keep your fingers out of the knife’s path.
Place the oyster cupped-side down on the board to help hold its liquid. Fold the towel over the shell, leaving the narrow hinge exposed, and grip the oyster through the towel. Keep it supported by the board rather than balancing it in your palm. Position the knife so that any slip would travel away from your hand and body. Work slowly; greater force is not a substitute for a stable grip.
Open the shell and free the oyster
Ease the tip of the oyster knife into the hinge, where the two shells meet. Apply gentle, controlled pressure and twist the handle until the hinge releases. The opening can be small. If the tip will not settle securely, reposition the oyster rather than driving the knife forward. Shell shapes vary, and some hinges take more patience than others.
Once the hinge gives, slide the knife just inside the top shell to cut the muscle that holds it shut. Keep the blade close to that shell so it does not dig into the oyster. Lift off the top shell and check the meat and liquid for bits of grit or shell. Slide the knife under the oyster to release it from the bottom shell, then transfer it to a clean bowl. If you want the briny liquid for the dish, pour it through a fine strainer to catch small shell fragments. Pick out any pieces you can see on the meat as well.
Keep the oysters cold, then cook the dish thoroughly
Shuck only as many oysters as you can handle comfortably, returning the bowl of oyster meat to the refrigerator if you need to work in batches. Do not leave the oysters sitting out while you prepare the rest of the recipe. If you are baking them in their shells, rinse away any visible shell grit and arrange the cleaned bottom shells on the baking tray before adding the oysters back.
For a cooked dish, follow a recipe that cooks the oyster meat thoroughly, and use applicable local food-safety guidance when checking doneness. A citrus dressing can brighten the finished dish, but lime or lemon juice does not make raw seafood equivalent to cooked seafood. Add citrus for flavor, not as a substitute for cooking. When you finish, promptly refrigerate leftovers in a covered container and wash and sanitize anything that contacted the raw oysters.